In this chapter we’ll step through practical examples showing to create chunked datasets. To start we’ll look at how to create individual Zarr datasets and save them, where each Zarr dataset represents a single 3D image. Then we’ll look at how to create an OME-Zarr multiscale image, to to save it, and how to add downsampled images that live alongside the original full resolution image.
Note: this chapter (and the whole of the textbook) uses Zarr version 2 and OME-Zarr version 0.4. Although newer versions exist (Zarr version 3 and OME-Zarr version 0.5), software tools have not quite caught up to support the newer versions.
import matplotlib.pyplot as plt
import numpy as np
from rich import print

from data_helpers import load_heart_data, plot_slice
Creating Zarr datasets
To being this chapter, we’ll look at how to create Zarr datasets. As a recap from chapter 1, Zarr is a specification for storing individual arrays, and groups of those arrays, in some sort of storage medium.
To start with we’ll load our heart sample dataset again, as a NumPy array.
heart_image = load_heart_data(array_type='numpy')
plot_slice(heart_image, z_idx=70)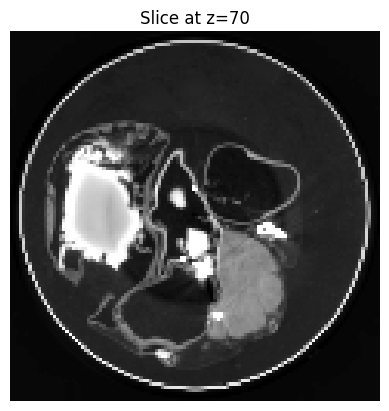
While it is possible to easily save this data to the Zarr format using the zarr-python package in one line, we’re going to take a slightly different and more manual approach. Our approach will avoid hiding the configuration of the Zarr data. This way we’ll see what options are available to use when creating a Zarr array, and the process mirrors the one we’ll use later in this chapter to create an OME-Zarr dataset.
Using a library called pydantic-zarr, we can create an array specification. This is a model of how we want to configure the Zarr array.
from pydantic_zarr.v2 import ArraySpec
from numcodecs import Zstd

array_spec = ArraySpec(
    shape=heart_image.shape,
    dtype=heart_image.dtype,
    chunks=(32, 32, 32),
    compressor=Zstd(level=5),
    attributes={}
)
print(array_spec)We’ve specified four different parameters:
shape: The shape of array we want to store.dtype: The data type of the array we want to store.chunks: The chunk shape of the Zarr arraycompressor: The compression algorithm (and any configuration for it) that we want to compress the data with [1].
And some parameters have been filled in automatically for us with default values:
zarr_version: the version of Zarr used to save the arrayattributes: any custom metadatafill_value: the value assumed if no data has been writtenorder: the memory orderfilters: any filters applied to the data before being saveddimension_separator: the character separating chunks in different dimensions when the data is saved
Now we’ve specified the array configuration, we can convert this to an actual Zarr array.
To do this we need to create a store.
This represents where the Zarr array is stored - examples include in memory, on a local disk, or in some remote cloud storage.
For a list of available stores see the zarr.storage documentation.
Here we’ll use a in memory store.
import zarr.storage

store = zarr.storage.MemoryStore()
zarr_array = array_spec.to_zarr(store=store, path="/")
zarr_array
<Array memory://134131025475200 shape=(120, 120, 139) dtype=uint8>The zarr array we’ve created acts in the same way as a normal NumPy array, so we can pass it to functions that work on NumPy arrays like our plot_slice function:
plot_slice(zarr_array, z_idx=70)
This doesn’t look right! That’s because we never add any data to our Zarr array, so it’s assumed that all the data takes the fill value, which is
print(zarr_array.fill_value)To add data to the array, we can just assign it using the usual NumPy syntax. The [:] here means “all the data in this array”:
zarr_array[:] = heart_image[:]
plot_slice(zarr_array, z_idx=70)
To recap, there were three steps to creating an array:
Specify the array metadata
Use that metadata to create an empty Zarr array in a specific store
Fill the new array with data
To change where the array is stored, we can change the store used, for example to save to a local directory on your computer:
from pathlib import Path
import tempfile

from data_helpers import get_directory_contents

temp_dir = tempfile.TemporaryDirectory()
temp_path = Path(temp_dir.name)
print(f"Created temporary directory at {temp_path}")
print(f"Directory contents before saving: {get_directory_contents(temp_path)}")

store = zarr.storage.LocalStore(temp_dir.name)
zarr_array = array_spec.to_zarr(store=store, path="/")
print(f"Directory contents after creating array: {get_directory_contents(temp_path)}")

zarr_array[:] = heart_image[:]
print(f"Directory contents after adding data: {get_directory_contents(temp_path)}")After saving the (empty) array, two files are created - ‘.zarray’ and ‘.zattrs’. These store the Zarr array metdadata. After adding data to the array, four more folders appear - ‘0’, ‘1’, ‘2’, ‘3’. These folders store the array data.
For the rest of the tutorial we’ll switch back to storing the array in memory.
store = zarr.storage.MemoryStore()
zarr_array = array_spec.to_zarr(store=store, path="/")
zarr_array[:] = heart_image[:]
temp_dir.cleanup()
Creating OME-Zarr datasets
OME-Zarr is a specification for storing bio-imaging data. OME-Zarr data consists of two components:
Data stored in Zarr format
Metadata used to interpret the data
The OME-Zarr metadata is additional metadata that lives in the attributes property of Zarr arrays and groups.
The OME-Zarr specification contains details for storing a number of different types of data.
For storing 3D imaging data we will use the multiscale specification.
Writing OME-Zarr datasets
There are a number of different Python libraries available for writing OME-Zarr multiscale datasets. A list of them at time of writing, along with their pros and cons is available in the appendices. For this textbook we’ll be using ome-zarr-models, which is a Python package for creating and validating OME-Zarr datasets.
Lets start by loading some data to convert to OME-Zarr.
At this point we just have a single 3D image array, stored as a numpy array in the memory of our computer.
To save it as an OME-Zarr Image dataset, we will use the ome-zarr-models library.
The first step is to create a new OME-Zarr Image:
from ome_zarr_models.v04 import Image
from ome_zarr_models.v04.axes import Axis

voxel_size = 19.89
ome_zarr_image = Image.new(
    array_specs = [ArraySpec.from_zarr(zarr_array)],
    paths = ["level0"],
    axes = [
        Axis(name="x", type="space", unit="um"),
        Axis(name="y", type="space", unit="um"),
        Axis(name="z", type="space", unit="um")
    ],
    global_scale = [voxel_size, voxel_size, voxel_size],
    scales = [[1, 1, 1]],
    translations = [[0, 0, 0]],
    name = "heart_image"
)
print(ome_zarr_image)As before, we can write this (empty) zarr group to a store:
ome_store = zarr.storage.MemoryStore()
ome_group = ome_zarr_image.to_zarr(ome_store, path='')
print(ome_group)Now the Zarr group exists, we can get the array from it
level0_array = ome_group[ome_zarr_image.attributes.multiscales[0].datasets[0].path]but as before, we haven’t filled the array with any data yet.
print("Before filling:")
print(level0_array[:, :, 0])
# Fill the data
level0_array[:] = zarr_array[:]
print("After filling:")
print(level0_array[:, :, 0])The real power of OME-Zarr comes from not just storing original high resolution data, but including lower resolution copies alongside. This enables the low resolution data to be loaded when looking at the whole image, but as you zoom in higher and higher resolutions of the data are progressively loaded.
Lets remind ourselves of the current datasets in our Image
print(ome_zarr_image.attributes.multiscales[0].datasets[0])To create downsampled datasets, we’ll start with the original array specification, and create identical array specifications with smaller shapes.
import math

full_res_spec = ArraySpec.from_array(zarr_array)
print("Original array specification: ", full_res_spec)

downsample_levels = [0, 1, 2]
downsampled_specs = [
    full_res_spec.model_copy(
        update={"shape": tuple(math.ceil(i / 2**d) for i in full_res_spec.shape)
    }) for d in downsample_levels
]
print("Downsampled array specifications: ", downsampled_specs)With this new set of array specifications we can create a OME-Zarr image with multiple downsampled levels
multiscale_image = Image.new(
    array_specs = downsampled_specs,
    paths = [f"level{d}" for d in downsample_levels],
    axes = [
        Axis(name="x", type="space", unit="um"),
        Axis(name="y", type="space", unit="um"),
        Axis(name="z", type="space", unit="um")
    ],
    global_scale = [voxel_size, voxel_size, voxel_size],
    scales = [[2**d, 2**d, 2**d] for d in downsample_levels],
    translations = [[0, 0, 0] for d in downsample_levels],
    name = "heart_image"
)
print(multiscale_image)As before, we’ll save this to to a store, so we can then write the array data
multiscale_store = zarr.storage.MemoryStore()
multiscale_group = multiscale_image.to_zarr(multiscale_store, path='')
print(multiscale_group)And finally we’ll fill up the arrays. The first level is filled with the original image data. Then scipy.ndimage.zoom is used to create downsampled versions of the same array to store at the other levels.
import scipy.ndimage

multiscale_group['level0'][:] = zarr_array[:]

for dataset in multiscale_image.datasets[0][1:]:
    scale = dataset.coordinateTransformations[0].scale
    print(scale)
    downsampled_array = scipy.ndimage.zoom(zarr_array[:], zoom=[1 / s for s in scale])
    # Write downsampled arrays to Zarr storage
multiscale_group[dataset.path][:] = downsampled_arrayTo double check this has work, lets plot the lowest resolution level.
level2_dataset = multiscale_image.datasets[0][2]
print(level2_dataset)

level2_array = multiscale_group[dataset.path]
print(level2_array)

plot_slice(level2_array, z_idx=17)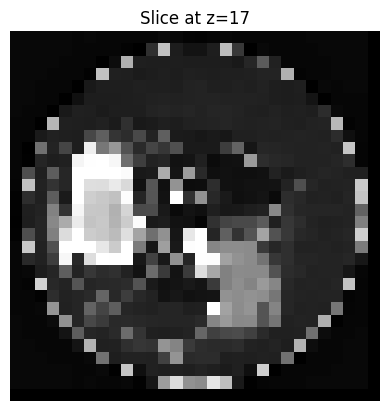
Choosing the right compressor depends on trade offs between read speed, write speed, and how much the data is compressed. A short set of benchmarks to help guide this choice is available at heftieproject
.github .io /zarr -benchmarks